Sunday, January 30, 2011

The Stabilator is done!

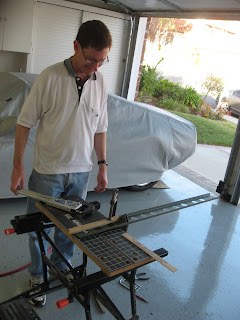
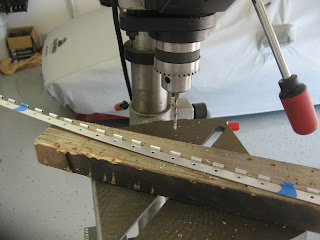
When I was working on the Anti Servo, one of the steps was to break apart the hinges and use the template provided to drill out the holes for mounting.  Well that is what I did…on all four parts.  The problem is that I should have only done this on two parts.  The other two parts of the hinge used a different side of the template and had a different pattern.  So today I started out by drilling my new hinge per the instructions.


Once the drilling was done, I put aside the hinge and went on to put the skins on the stabilator frame.


You can see that I taped of f the holes that should not be riveted yet.  If you look close you will see that I missed a few holes and will be drilling out 8 rivets later in the day.


Here it is all riveted on both the left and right halfs


Now to put the drilled out hinge on


If you look close at the clecos and go back to the tape marks you will see where I had to drill out the rivets.  The drilling was easy.  The hard part was shaking the inside half of the rivet out of the stablilator so that I did not sound like a spray paint can when i moved it around.


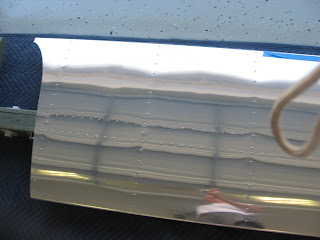
And here is the finished part


Sunday, January 23, 2011

Continuing on with the Stabilator

Continuing on with the Stabilator, I read several build logs out there and discovered what I needed to do to get the control horn in.  Unlike other back nut holes, this one did not come pre drilled.  You are expected to bolt in the back nut and drill out and counter sink the proper holes.  No problem but not clear in the instructions.
I then went on to mount the counter weight.  The instructions are much more clear here.  Match drill the brackets and then turn them 90 degrees.  Install the counterweight pole and match drill these holes.  Everything went smooth.


After I had everything drilled and counter sunk, it was a matter of riveting everything up.  I am getting much better at the squeeze rivets.


Finally I riveted on all the ribs and bolted on the hinge brackets.  All is ready for putting on the skins
When I did the hinges for the anti servo, I went ahead and drilled out the hinges for the back of the Stabilator.  If I would have read ahead I would not have used the wrong side of the drill template.  I had to order a new hinge from Vans.  That’s where I will start next week-end


Saturday, January 22, 2011

Building the Stabilator

Today I started on the Stabilator.  I laid out all of the parts so that I could get an idea of what it would look like.


I knew from reading several build logs that some of the holes had to be countersunk with 120 degrees instead of the normal 100 degree countersink.  I took the advice I found and circled each hole with black for 100 and blue for 120.  This worked out well


Then it was on to cutting apart peaces and deburring them.


And building the Spar box


I got to the point of putting on the control horns and it is not very clear in the instructions.  I need to go on the web and do some more reading.  Back at it tomorrow


Monday, January 17, 2011

Yesterday I completed the AntiServos.  Not many pictures as it was all straight forward
Parts ready to go


Riveting up the parts


Finished parts


Saturday, January 15, 2011

Today I finished off the rudder.  Went together like a simpler version of the Vertical Stabilizer.  I had the same problems with the squeeze rivets that I read about on other build logs but after several tries it all came together
 Here is a look at all the parts ready for assemble


Here I have the upper squeeze rivets in


A little help from Ed


And my daughter the future pilot


Look how proud she is of her work

The finished parts

Sunday, January 9, 2011

We have our first Aircraft Part

The goal today was to finish the Vertical Stabilizer.  I started out with all of the parts that I would need primered and ready to go.  I assembled the Christmas tree without any problem.


Then I went on to work with the skins.  I put in the counter sink holes with the dimple dies and riveted in the nuts


Then I proceeded to cleco in the skins


Ed finally showed up to help with the riveting


And we have a finished part